Monday, November 29, 2010

A Plea for Forgiveness

Dear Readers,

It may seem like I have abandoned this cooking blog, but I haven't.  Since the end of August, I have been in school, working on my Masters in Library and Information Science.  Unfortunately, my time spent on school work each evening has left me little time to do much else, including writing in this blog.  I do realize that I have left what little group of, albeit loyal, readers that I have left in waiting.  Please understand that I will be picking up where I left off when the semester ends after next week.  I have plenty of recipes and photos waiting in the wings and I look forward to writing about cooking once again.  I hope to create a balance of school and writing next semester, so that I don't disappear for 4 months again.

I want to thank you those of you who have hung on this long and I sincerely hope not to disappoint once I resume my writing.

Best wishes in the kitchen,
m.

Wednesday, August 11, 2010

A Delicious Surprise: Greek-Style MahiMahi with Toasted Orzo with Saffron & Fennel

I think this is more than once I've said that my proficiency with fish is lacking.  One week I knew I wanted to make fish, but I wanted to try something new.  So I did what I always do in this situation and turned to my back issues of Gourmet (RIP) and found a rather interesting recipe.  It sounded interesting because it paired fish with cheese.  For some odd reason, fish and cheese just doesn't seem appetizing.  I mean, I love tuna melts, which pairs fish with cheese.  I also greatly enjoyed tuna-noodle casserole when I was little, which also paired fish with cheese.  I see, now, that both of these examples use tuna paired with cheese and not other kinds of fish, which is where it's left me feeling rather iffy.  I can't think of any other examples.  But, it sounded really good and I loved the sound of the side dish, but I'll get to that later.

I took a leap of faith in Gourmet's test kitchens and chefs and decided to give this a try.  I was pleasantly surprised when I went to have a taste and it was delicious.  The cheese, which is feta, actually wasn't that powerful and, when paired with lemon, mayonnaise and dill, it doesn't get in the way of the fish.  In fact, that's another issue I had with this recipe beforehand, which was baking the fish covered in mayonnaise.  For some odd reason, that seems weird to me.  I think it's because I can't pull mayonnaise away from its parts.  Eggs and fish?  I just can't visualize that tasting good, but, like I said, I was pleasantly surprised with this fish.  It had a ton of flavor and the fish was extremely tender.  In the end, I really enjoyed the dish a lot and will definitely make it again.

Like I said earlier, one of the reasons I wanted to make the mahimahi was because of the side dish:  toasted orzo with saffron and fennel.  I, for one, love orzo (my mom is not a fan; she expects rice, but it's pasta!).  It's pasta you can easily eat with a spoon.  I've only made it a few times, but this was one of the first times I made it with an actual recipe; I wasn't flying by the seat of my pants.  I also love fennel.  I'm a huge fan of black licorice and anything anise-y.  I usually make my Christmas biscotti with more anise than necessary just because I love that flavor.  I was really pleased with how this side dish came out. It had a great flavor and wasn't super heavy, like rice tends to be.  The flavors were really fresh and light and went perfectly with the fish.

Oh yeah - the mayonnaise sauce on the fish:  I would eat it with a spoon - so delicious!

Tuesday, August 10, 2010

Way Better than Boca: Homemade Veggie Burgers

Remember when the Food Network showed cooking shows?  Well, it feels lately that the network has been overrun with food competition shows.  Granted some of them are very good; I'm a huge fan of Chopped, actually.  Anyway, there were my favorites, like Everyday Italian, Nigella Bites, and Good Eats, which now can only be found at odd hours of the morning on Sundays.  Very rarely did I ever pay attention to the vibrant host of Diners, Drive-Ins and Dives - yes, he DID have an actual cooking show before they just let him eat on camera - Guy Fieri.  In all honesty, he's kind of a tool and I really don't care for him all that much, but I happened to be bored one afternoon and home and watching, as one often does in these situations, the Food Network and I saw an episode of his cooking show.  He had two guests on, his mother and his sister.  His sister happens to be vegetarian and so Fieri's show centered around her recipe for homemade veggie patties, or burgers.  They're awesome, as you can see depicted by my empty plate.  I managed to scarf down everything before I remember to take a picture of my plate all done up!

Now, I love beans and these veggie patties are all about beans.  There are 3 different kinds of beans in these patties with very different flavors and textures.  Another thing about this recipe is that it contains a heck of a lot of ingredients; 21 to be exact.  You certainly can't say these veggie burgers lack any kind of flavor at all and surprisingly enough, even with 21 ingredients, it isn't too big or muddled.  You do taste each spice and flavor and they end up being really delicious.  Since we've had these (first time I made these was more than a year ago), every time I've eaten a boca- or gardenburger, I'm horribly disappointed.  Plus, both of those patties are full of fillers like rice and bread (you'll notice the main filler here is rolled oats with only a little bit of bread crumbs, to hold everything together; you definitely don't taste either of these fillers, unlike the rice in gardenburgers); there's really no substance at all and they're rather tasteless.  I honestly think that prepared vegetarian or vegan foods are the words most processed foods and contain as much or maybe more chemicals than all other non-vegetarian processed foods.  These homemade veggie burgers are tasty, delicious, nutritious and easy to make.  They're great with sweet potato oven fries, which I spray with olive oil and sprinkle with salt, pepper and cayenne with a little bit of brown sugar.

Just remember:  to make this meal a complete protein, make sure to pair with a whole grain (we served the burgers on whole wheat buns)!

Oh yeah, I wanted to comment on the funky measurements below.  The first time I made these, I had to keep a conversion chart handy, so I knew how many of each item I actually needed.  I'm a fan of volume measurements (cups, teaspoons, tablespoons, etc) and not weight, especially since I don't have a kitchen scale.  I have a strong feeling that since Fieri's shtick is that of a bachelor, he has a shot glass or jigger handy from his bar and uses that for measuring out liquids.  Anyway, believe me when I say that the measurements here really don't make a huge difference.  You will, though, end up with a mishmash of half-open cans of beans.  I usually end up making some kind of chili soon after making these burgers, just to use up the beans and not let them go to waste.

Monday, August 9, 2010

Light & Refreshing: Grilled Chile-Lime Salmon

I remember when I found this recipe.  I knew I wanted grilled salmon.  However, since my fish-cooking knowledge is rather limited, I wasn't sure how to season the salmon.  At the time, I had a handful of limes on-hand from another meal I had made recently and I didn't want them to go to waste.  When I searched for "grilled salmon" on epicurious.com (I love epicurious.com because they have all the recipes from pretty much all recent issues of Gourmet, RIP), it yielded a whole slough of different recipes and I couldn't really get into any of them.  I was definitely looking for a recipe which was simple and quick, but, of course, tasty.  One recipe stuck out above the rest:  grilled chile-lime arctic char.  I had had arctic char before and I remembered it was very similar to salmon; same fatty and pink fish with similar flavors.  It helped that the recipe included some substitution options at the bottom, including swapping out the arctic char with salmon.  Perfect!


One thing I look forward to during the summer is asparagus.  Yes, and lets get this out of the way to get our giggles out beforehand:  asparagus makes your pee smell.  In some ways, I find this reassuring that my body is working the way it should.  But yeah, depending on the asparagus, it can be rather embarrassing in mixed company.  However, when it's just Marshall and I - who cares?  So, Marshall and I made a trip to our local farmer's market and picked up some really awesome, super thin, asparagus - totally perfect for grilling.  I simply drizzled them with olive oil, salt and pepper, and they went on the grill until tender.  You'll also see a tiny pile of sautéed spinach on my photographed plate.  This did not appear on our plate with leftovers, but I had some baby spinach I bought for my sandwiches the week before and I wanted to use it before it went bad.  I really love sautéed greens.  The spinach went into a pan with olive oil and chopped garlic.


All in all, it was a satisfying and light meal, perfect for a hot summer evening!


Sunday, August 1, 2010

Success through Failure: Homemade Pizza

Marshall loves pizza.  I like pizza, but Marshall loves it.  It's one of those foods he could eat all day every day without ever getting tired of it.  I can only eat pizza when I'm in the mood for pizza.  Now, show me something like Japanese or sushi or Chinese or Mexican - I can eat that nonstop.  We all have our go-to food and pizza is a big thing for Marshall.  A couple of years ago, he was on a homemade pizza kick and so for his birthday he got a pizza cookbook, a pizza peel, and a ceramic pizza stone.  After our first foray into making our own pizza dough, we broke our pizza stone.  According to the almighty Alton Brown, the way to get a good crunchy-but-chewy dough, is to heat up the oven really hot and then make a steam bath at the bottom of the oven, so it's not a super dry heat, but it has a bit of moisture to chewy-up the dough.  Well, this made our pizza stone crack right down the middle.  Who knew?  We tried again, but we both agreed it seemed like too much work, even if it was rather tasty.

Fast-forward to the present time, I kept hearing from my mom and my sister how easy it was to buy the raw pizza dough from Trader Joe's to make homemade pizza.  This sounded great because the most time-consuming part of making pizza is getting the dough made.  This cut out that almost full day of mixing, kneading, and proofing before you can even think of eating it.  We got the dough.  It seemed a little more wet than than we had expected.  So, we thought we'd add a little flour to it and knead it.  It still was super sticky and not like the pizza dough we had worked with before.  We both worked to get this dough into a pizza shape.  Once shaped, we piled on the toppings.  Both of us love pizza with lots of toppings:  sauce, cheese, pepperoni, sausage, peppers, mushrooms, onions, and olives.  We get ready to slide it off onto our [metal] pizza cooker, which had been sitting in the oven getting nice and hot and the pizza won't slide off the peel.  That peel had cornmeal and flour and we were both stumped as to how it was still stuck.  With the oven wide open and all the 500F heat escaping into the kitchen, we grabbed all the spatulas we could find to get the pizza into the oven.  We finally did and this is what we ended up with:


Yeah...we ended up with a very ugly, half-assed calzone, rather than a pizza.  Granted, it tasted really good, but when you're looking for pizza and this is what's on your plate, it's rather disappointing.


Marshall really wanted to get this pizza right, though, so he dug out our copy of Alton Brown's I'm Just Here for More Food (2004) and looked up the pizza dough recipe we had used long ago.  He prepped the dough:  mixed it, kneaded it and proofed it.  Everything was going well.  We learned from our original failure and when it came to topping our pizza, we scaled things back a bit.  This time we went with only a few toppings:  sauce, cheese, spicy Italian sausage and bell peppers.  It stretched correctly and wasn't sticky.  It slipped right off the peel into the hot oven and we finally got a pizza.  It was delicious.  I like Brown's pizza dough, which is the thin crispy type of pizza dough and not thick at all.  There is a bit of chew, but it's not too chewy either.  It was apparently too delicious to photograph and we devoured it before we could snap a photo of its beauty.  Just imagine a lovely pizza topped with tomato sauce, fresh mozzarella, crumbled hot Italian sausage and green bell peppers - delicious!


We can only learn from our past failures.  If we don't fail at least once, how would we know how much we've learned?  I've had those nights were dinner just didn't go right at all.  The recipe wasn't written well or I was too tired and misread a step.  I remember one night trying to make miso soup all from scratch, even down to the step of making my own dashi.  I ended up with a kitchen full of random packing and bits of chopped ingredients scattered about and a soup in a pot that just didn't look right at all.  It was just enough to push me over the edge and I dumped everything and we ordered take-out.  A few weeks later, I tried again and it came out like it should have.  Granted, I don't think I will attempt to make it all again, unless I was truly into it, but the point was I dusted myself off, got back up and tried again.

Here's to more learning experiences!  :)

Tuesday, July 27, 2010

Good Food from Friends: Shrimp with Green Sauce and Zucchini Ribbons


Perhaps this will bit me in the butt later in life, but no matter what the issues with cholesterol, I love shrimp.  I'll eat shrimp any way I can and I'll be happy to cook it.  One of my favorite ladies at my local butcher taught me the easiest way to clean and shell shrimp.  Once I learned how easy it was (essentially take kitchen shears or scissors and snip right up the back of the shrimp; this allows the shell to peel off easily AND cleans out the vein), I was on my way to become a shrimp-cooking fiend.  Shrimp is so easy and it's very versatile.  Yes, I could go on and on like our good friend Benjamin Beauford Blue, or "Bubba", and tell you all the ways you can cook and eat shrimp, but I think I'll move on while I'm ahead.


Charisse, a friend of mine from high school kept in touch with one our close friends, Nicole.  Nicole was the one who introduced me to Charisse and her husband's food blog, foodies @ home.  I thought it was a great blog.  I had just started getting into reading cooking and food blogs and I liked their style.  I also liked the dishes they were making.  I say "we" because they both switch off cooking and writing.  Plus, their photos are great and make their dishes even that much more mouth-watering.  After following them for a few weeks, I decided to try out one of their dishes:  Shrimp with Green Sauce and Zucchini Ribbons.


Like Charisse, I love zucchini.  My mom used to prepare zucchini in the most simplest of ways:  broiled in the oven with Parmesan cheese, pepper and olive oil, and, of course, she used them in frittatas.  I am always up for trying new ways of cooking old favorites and this dish seemed right up our alley.  The recipe was really easy to follow and the end result was delicious.  It was fresh and flavorful and, for a pasta dish, was not too filling at all.  We really enjoyed it here and I'm looking forward to what else Charisse and her husband keep cooking up!


Tuesday, July 20, 2010

Ya Mon! - Jerk Chicken with Grilled Banana and Onion Salsa

Let's quickly address the rather large pachyderm in the room:  Yes, it has been a while since I last posted.  There, issue addressed; let's move on, shall we?

In the interest of time and preserving my dignity, I will not divulge when this meal was cooked and eaten.  What I will tell you is that it was a delicious meal.  I will, though, apologize for the lack of chicken-prep photos, which were Marshall's responsibility and in the joy of grilling the chicken, he forgot.  We also grilled the chicken a night ahead, due to an even or something.  We have a schedule when we eat.  We are creatures of habit and keeping a "cook Monday and Wednesday; eat leftovers Tuesday and Thursday; figure out something Friday through Sunday" is easy for us to make sure we're eating more at home than coming up short on what to eat and ending up going out.

Anyway, all that aside:  this was exactly how the editors of Cook's Illustrated described this chicken:  easy, as well as being very tasty.  It also wasn't really super spicy, which anything labeled "jerk" tends to be.  The marinade/rub does contain habenero peppers, but they aren't there in the forefront.  What you get is an extremely flavorful and juicy chicken with a very nice warmth, which only suggests the pepper's presence.  What really stands out in this meal is the side dish:  grilled banana and red onion salsa.  We treated this more like a salad, rather than a salsa.  But, it's a great dish and it packs so much flavor and it's a refreshing counterpart to the spicy and warm chicken.  The grilled bananas and red onions are sweet, but not too sticky.  The dressing is minty and with just a spark of rum ties everything together.  Considering I've never been to Jamaica before, I can't say how this stacks up to what you would find on the island, but I can only imagine it holds its own against the authentic birds being fired up on the street.  Is it bad that I wanted to construct my own charcoal grill out of a discarded oil drum and cook my chicken just to get that close to authentic?  :)


Sunday, June 27, 2010

Best Grilled Chicken Ever: Thai-Style Chicken with Spicy Sweet and Sour Sauce


I first must apologize for the lack of photos for this entry.  If I remember correctly (which is a horrible thing to say and I should be able to keep up with this thing!), I started preparing this chicken and halfway through realized I needed more limes.  For some odd reason, my local market has been having horrible luck with limes.  They end up being dry and hard as rocks.  I go to use them and I can barely get two drops of juice. This happened while trying to get the spice mixture, which is placed underneath the skin, for the chicken and I ran out of limes to juice.  What was funny, in a sad way, was that Safeway ended up having much better juice-laden limes than my local Italian market.  Anyway, while preparing this chicken, which ended up taking forever due to the marinating time and running out of limes, I said to Marshall, "This better be the best @#!$ing chicken ever, because this is ridiculous!"  Well, my friends, it was.

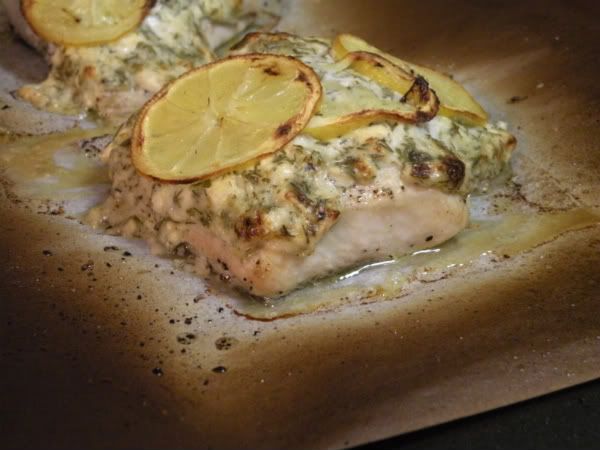
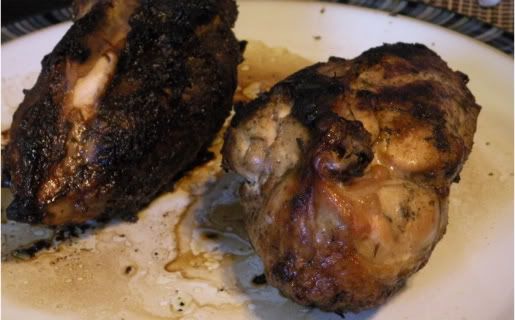
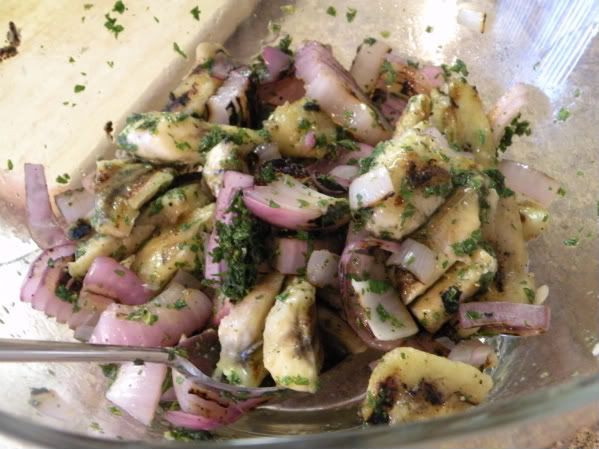
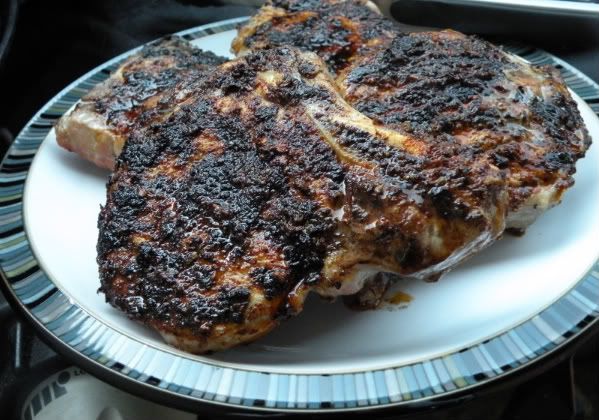
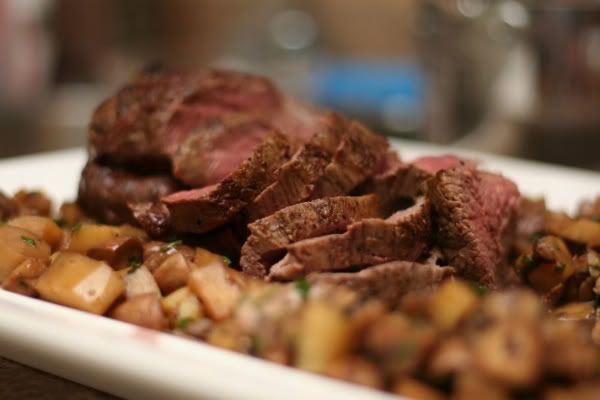
I wasn't expecting to enjoy this chicken as much as I did.  For one thing, the spice mixture contains a good deal of coriander, which my body does not like.  My stomach actually turns at the smell of coriander.  I can take it in small doses, but anything with a strong coriander flavor or contains whole coriander seeds, I cannot eat without feeling sick.  I never cooked much with coriander before, but I remember my mom went through this kick.  She and my dad found this restaurant down the street from them, which is no longer there, called Asian Fusion.  Essentially, it was a restaurant that infused all sorts of Asian cuisines onto one menu.  They had a little Chinese, a little Vietnamese, a little bit of Indian, all rolled into one.  They had a side dish simply called "Coriander Rice".  It was regular white steamed rice, but they threw in a bunch of whole coriander seeds into the rice cooker.  This infused the rice, so you could have a "scented" rice with your main dish.  My mom was all over this.  She even learned to make it at home.  She served it with everything for a while, it seemed, and I just couldn't stomach it at all.  It wasn't the flavor, but more the aroma which just didn't agree with me.  Luckily, this chicken wasn't very CORIANDER-y, but it had an underlying flavor of that spice.  Most of the coriander was in the spice rub, which was cooked with the chicken in such a way that it could be scraped off.  Now, I don't like admitting when I'm a picky eater, but I just had to do this a few times with my chicken.  This being said, though, it really was some awesome grilled chicken.  Having the breast with the skin and bone-in locked in all the juices and the meat remained tender and extremely juicy.  The rub penetrated the meat, so the flavor went past the surface and into the entire piece of chicken.

The spicy sweet and sour dipping sauce was an excellent addition and added an almost refreshing flavor contrast to the aromatic chicken.  The spicy red pepper flakes were perfect, too, adding just enough heat to compliment all the other flavors in the spice rub.  I took advantage of the side dish recipe, provided with the chicken:  Sesame Noodles with Sweet Peppers and Cucumbers.  I didn't get any pictures of the side dish, quite simply because it wasn't photogenic.  Although it tasted great, it didn't look all that lovely.  I think it was the brown dressing, which made the dish look like a big bowl of chunky peanut butter.  However, the flavors were wonderful and the meal as a whole was delicious.

Wednesday, June 16, 2010

¡Que Sabor! - Grilled Baja-Style Fish Tacos

Before I say anything else, I want to get this out there:  I love fish...but I'm afraid of it.  The problem comes from not being familiar and comfortable with preparing fish.  I've been on the wrong end of bad fish before and it is NOT pretty.  I would hate to do that to Marshall or myself or any guests for whom I cook.  I'm comfortable with chicken and lamb.  I've gotten continuously comfortable with red meat (I used to hate the blood-factor).  I just never worked on strengthening my relationship with fish.  Of course, it all comes from how you were raised, right?  Unfortunately, we never got to eat a lot of fish when I was growing up.  My dad is deathly allergic to all types of fish.  He'll even start coughing if there's even the smell of fish.  When he was little, his parents fed him fish, unaware of his allergy, and he ended up in the hospital not being able to breathe.  Since then, he's steered clear of fish as much as possible.  This meant, of course, that my mom and I couldn't cook fish for dinner.  We did, however, take advantage of the nights my dad worked late or when he volunteered at my elementary school's weekly bingo night.  My mom and I would pop over to the store, pick up some fish and cook it up.  Normally it was marinated catfish, which was easy to throw in a fry pan.  I remember eating salmon a few times, but nothing really elaborate.  Since then, my repertoire has been skimpy on the fish.  Marshall and I try to eat healthily and what's more healthy than fish, right?  I've worked hard to get over my squeamishness over fish.  I'm learning more and more with every dish I make.  I've gotten to the point where I'm consciously searching for new fish recipes to add to our menu each week.

A few weeks ago, I found a recipe for one of my favorite things:  fish tacos.  They're so easy, but so easy to screw up.  I definitely do not care for fried fish tacos; I really like grilled fish.  Thanks to my trusty friend in the kitchen, Cooks Illustrated (I really should just bite the bullet and order a subscription already!), I found a great recipe for Baja-style Fish Tacos.  The recipe overall was easy and prepared not only the fish, but also a spicy spread and cabbage salad to garnish.  The page also showed a recipe for a Mexican-Style Marinated Tomato Salad.  Sure, it was just the salad version of guacamole, but it was really delicious and paired well with the tacos.  Plus, it photographs really well!  Both dishes were delicious and perfect for the warm weather.

The recipe also called for mahi-mahi, but unfortunately the fishmonger I frequent did not have any when I went shopping.  Luckily, the recipe provided some helpful replacements, if mahi-mahi could not be found.  I love when recipes provide options for main ingredients.  Since I'm unfamiliar with fish, I don't really know what substitutes can be made.  It's not like picking out substitutions for cuts of beef or chicken.  Each fish has its own distinct flavor and texture, which play well with different flavors and cooking methods.  One of the fish they suggested was red snapper, which my fishmonger had, so I used that.  The recipe also suggests using halibut or swordfish, as well, in case mahi-mahi and red snapper cannot be found.  Just be careful of the swordfish, since high levels of mercury is found in swordfish.  A helpful link is Seafood Watch, which is prepared and constantly updated by the Monterey Bay Aquarium.  Seafood Watch provides helpful suggestions and tips for which fish to buy at certain times throughout the year, as well as whether or not to buy farmed or fresh and how the fish is caught.  Normally, fresh-caught fish is best, but the sticky bit is how it's caught.

Thursday, June 3, 2010

Grill Time: Giant Pork Chops with Adobo Paste

You know the sounds; you know the smells.  The sun warms the grass; the days are longer; the air is light and sweet and what's that other smell?  That's right:  the smell of spice and flame-kissed meat.  We would have actually fired up the grill much earlier this year, had it not been for the rather cold and wet May we experienced. Luckily, things started warming up recently and we could finally unfurl the cover on our Weber Q and start the gas.  Yes, we have a gas grill.  It is illegal in our city/county to use a charcoal grill in a multi-family building.  Technically, we should actually be using a much smaller gas tank than what we have, BUT since no one can see it...  Anyway, enough about the technicalities.  Marshall and I have been learning to grill and mostly rely on well-written recipes with explicit grilling instructions.  For a wedding gift, we got a probe thermometer, which has helped us rely on the meat and not the recipe to tell us when its done.  But, we have been learning fast and been more adventurous with our grill.

One stand-by recipe we have turned to over the last couple of years comes from, where else, Gourmet magazine.  The July 2007 issue was the all-grill issue.  This same issue taught us how to grill a Caesar salad, too! Our inaugural grilling dish for this year was Grilled Giant Pork Chops with Adobo Paste.  I grew up in a house that didn't do much pork.  My dad was never a fan, so my mom tended to steer clear of it for everyday meals.  I've learned, though, that pork can be quite tasty and it's a great lean protein, too, like chicken.  The first time I made this dish, I fell in love with the adobo paste.  It's a simple mixture of spices, oil and lime juice, but the smell that arises from the paste is heavenly.  It's smoky, spicy and tangy, without being clawing.  I really makes your mouth water, just from the smell.  One thing I have done differently is I go with the thinner bone-in pork chops and not the giant pork chops.  We did the giant pork chops the first time and they're huge.  They're much bigger than either of us could eat on our own.  I don't change the amount of paste I make, which might be more paste than what I SHOULD use, but we love it anyway.

To go with these delectable chops, I went with a salad.  It was a green salad, but I wanted to do something complimentary to the pork.  My sister makes a cilantro-lime dressing which is really good.  I had planned to mimic this and make my own, but I ran out of time to make an actual dressing.  Instead, I made a salad with green leave lettuce, bell peppers, carrots, tomatoes, avocado, and white corn.  Then I loosely chopped some fresh cilantro and threw it into the bowl.  I dressed the salad with cracked black pepper, kosher salt, garlic powder, a few dashes of chili powder, fresh lime juice and olive oil.  It was surprisingly good and refreshing and definitely complimentary with the chops.

Finally, I wanted a starch.  I'm a total starch fiend.  I love my bread, pasta, corn and potatoes.  I think it comes from being in an Italian family.  Even with pasta, we always had bread at the table.  With just the two of us, Marshall and I haven't kept this with our meals.  We also agreed that we are more apt to fill up on bread before eating the actual meal.  Anyway, I went with potato for a starch, but I was at a loss to how to prepare it.  Then I got an idea:  grill them!  So, I took a couple of potatoes, rinsed them, then sliced them into 1/2-3/4" rounds.  I left the skins on because the skin of the potato is the best part, in my opinion.  I drizzled the slices with a little olive oil and sprinkled them with kosher salt and pepper.  I put them on the grill after finishing the chops and cooked them, flipping over a few times, until grill marks appeared and they were tender to the touch.  The result was fantastic.  I loved the crisped exteriors and the creamy insides.  Plus, the really browned, almost burnt, bits were so incredibly yummy.  I really liked this cooking method for potatoes and I'll definitely find another excuse to make them again!  Maybe next time, I'll sprinkle of a little cayenne to spice them up...

So, join the party and fire up that grill (and be safe)!


Grilled Giant Pork Chops with Adobo Paste
Serves 4 


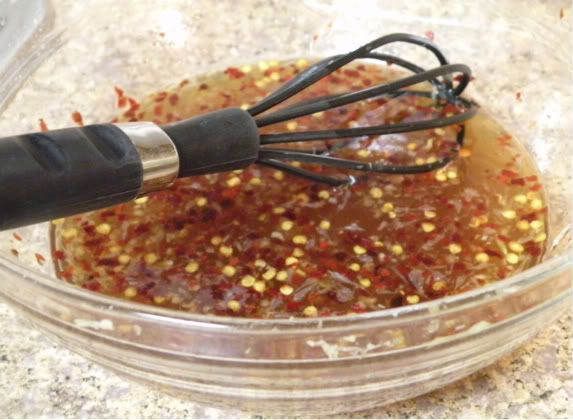
2-1/2 Tablespoons of Olive Oil
2 Tablespoons Sweet Paprika
1-1/2 Tablespoons Dried Oregano, crumbled
1 Tablespoons Garlic, minced
1-1/2 teaspoons Ground Cumin
1-1/2 teaspoons of Red Pepper Flakes
1-1/2 teaspoons Lime Zest
1-1/2 teaspoons Kosher Salt
1/4 teaspoons Black Pepper
4 Bone-in Loin Pork chops

1a.  (For charcoal grills) Prepare the grill for direct-heat-cooking over medium-hot coals.
1b.  (For gas grills)  Preheat all burners on high, covered, for 10 minutes.
2.  Stir together all ingredients, except the pork chops, in a bowl to form a spice paste, then rub paste all over pork chops.
3a.  (For charcoal grills) Oil grill rack, then grill chops over coals, turning over occasionally and moving if flare-ups occur, until browned, 2-3 minutes total.  Move chops to area with no coals underneath, then cover with inverted roasting pan (disposable is OK) and grill, turning chops over once, until thermometer inserted horizontally into the center of a chop (do not touch bone) registers 145F, about 8-10 minutes, depending on the thickness of the chop.
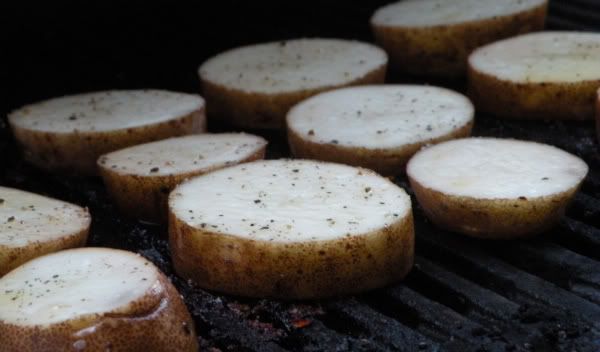
3b.  (For gas grills) Reduce heat to moderately high and brown chops, covered, turning over occasionally, 2-3 minutes total.  Turn off one burner (middle one if there are 3 burners) and put chops above the shut-off burner, then grill, covered, without turning, until thermometer registers 145F, about 12-15 minutes, depending on the thickness of the chop.
4.  Transfer to a platter and let stand 5 minutes before serving.

Monday, May 24, 2010

Carbo-Loading (2 of 2): Penne with Chicken and Broccoli


During the week leading up to our triathlon, which was the first Sunday in May (yes, I know I'm behind...), I tried to come up with dishes with healthy carbohydrates and lean protein.  Marshall had something similar in mind and told me he was interested in some kind of pasta dish with chicken and maybe broccoli.  Well, he just named 3 of some of my very favorite things, so it was easy to come up with a dish that would definitely satisfy.  However, my history has demonstrated that I'm not the greatest when it comes to thinking up dishes.  My sister is actually really good at just throwing things in a pot and coming up with something really yummy; my mom is the same way.  I suppose it comes from experience, but I am much more comfortable going along with a recipe.  In any case, I took on the challenge and actually came up with a really tasty pasta dish that I will try to replicate again.  I wasn't taking notes when I was cooking (I was, and still am, a horrible note-taker), so I'll do my best to explain how I made this dish.

I went to the store and picked out the main ingredients:  chicken breast (2, boneless/skinless), broccoli (about 3 crowns), and a box of penne (yes, I realize I could've made an even healthier dish with whole wheat pasta, but part of me really loves that plain semolina pasta flavor).  I decided to pick up a lemon or two, thinking lemon goes great with chicken no matter what.  The rest of the ingredients I had at home:  red pepper flakes, Italian herb seasoning, and olive oil.  Oh yeah, you can't forget the cheese, but I always have cheese in the house.  The day I made this dish, I was working from home, so I took advantage of the extra time and decided to marinate the chicken.  I seasoned the chicken, which I had cut up into bite-sized pieces (about 1-2" big) with salt and pepper, then placed it in a tupperware container.  I liberally sprinkled the Italian herb seasoning (definitely the no-salt kind; I shouldn't have to tell you that) on top, then added some smashed garlic cloves.  Over-top I drizzled a liberally helping of olive oil and then took the juice of one lemon and poured that on for the final flourish.  I put on the top of the container, shook well, then placed in the fridge for about 45 minutes.  When it came to cooking the chicken, I took a very simple approach.  I heated up some olive oil in a non-stick skillet over medium heat, and added some more crushed garlic.  After about a minute, I sprinkled a healthy dose of red pepper flakes and cooked those a bit with the garlic.  Then I threw in the chicken with its juice, and cooked until opaque.  As I was prepping the broccoli, I noticed a jar in the back of our fridge.  A coworker of mine, had Marshall and I over for dinner a few weeks prior and gave us a jar of preserved Meyer lemons.  I had looked for a few recipes using it, but until then had not come up with anything to use these lemons.  Then I thought, "hmm, you know, these might work here...".  Preserved lemons have a much softer peel and Meyer lemons are known for their thin layer of pith and tender skin.  You can easily cut them up into small pieces and cook them and they're great to eat skin and all.  I did the same here:  I took a half of a preserved lemon, cut it into small pieces and threw them into the pan with the chicken.  You could replicate this flavor by adding some chopped pieces of peeled lemon or by simply sprinkling some lemon juice over the chicken while it cooks.  What came out was a delicious dish with a bright lemony flavor.  Plus, it had broccoli in it, which, in my book, is always a plus!


Lemony Chicken and Broccoli with Penne Pasta
Serves about 4

2 Boneless and Skinless Chicken Breasts, cut into 1"-2" pieces
6 Cloves of Garlic, crushed and divided
1-1/2 Teaspoons of Italian Seasoning
1 Lemon, juiced
2 Tablespoons of Olive Oil

1 Tablespoon of Olive Oil
1-2 Teaspoons of Red Pepper Flakes (to taste)
1/2 Preserved Meyer Lemon, cut into small pieces (optional) -OR- 1/2 Lemon, juiced
2-3 Crowns of Broccoli, cut into florettes
1/2-3/4 Pounds of Penne Pasta (or any other shape pasta you like)

1.  Add the chicken, 3 cloves of crushed garlic, Italian seasoning, lemon juice, and 2 tablespoons of olive oil into a tupperware container or bowl, mix well, and cover.  Place in the fridge for about 30-45 minutes.
2.  Start a large pot of salted water to boil.  Add the pasta.  Cook about three-quarters of the way (according to the package instructions) and add broccoli to the water.  Finish cooking pasta, in that time the broccoli should be adequately cooked, as well.  Drain well and set aside.
3.  Heat the remaining tablespoon of olive oil in a non-stick skillet over medium heat.  Add the remaining crushed garlic and cook for 1 minute.  Add red pepper flakes and sauté for an additional minute.  Add in the marinated chicken pieces, plus the marinade, into the pan and cook until opaque (roughly 10 minutes, if that). If using, add in the Meyer lemon pieces and heat through.
4.  Toss chicken with pasta and broccoli and serve with freshly grated Parmesan cheese.

bon appetit! 

Tuesday, May 11, 2010

Carbo-Loading (1 of 2): Fettuccine with Peas, Asparagus, and Pancetta

I believe I mentioned in a previous post that I absolutely loved my subscription to Gourmet and was devastated when they were shut down.  Well, as a consolation prize, they graciously offered to fulfill the rest of my subscription with Bon Appetit.  BA isn't my favorite cooking magazine.  Their issues don't contain as nearly as many recipes as G had and their food photography wasn't nearly as drool-inducing.  I mean, their food photos look plastic and unreal.  I loved that I could look at a photo of a steak on the cover of G and could actually taste it in my mouth.  With BA, it's just not the same.  Anyway, I finally got my new issue last month.  I found a recipe that caught my eye.  Marshall and I competed in a triathlon on May 2nd (it was my very first) and we needed to find something good to eat the week leading up to the event.  I figured we needed to carbo-load and this was a good start:  Fettuccine with Peas, Asparagus, and Pancetta.

What struck me most about this recipe is that it reminded me of a risotto dish Marshall and I made a couple of years ago.  It was a recipe from Ellie Krieger and it was a Primavera Risotto with asparagus and peas.  Obviously, since both recipes share ingredients they had similar flavors.  Of course, the big difference, and the one ingredient that really brought the flavor, was the pancetta.  I love pancetta.  My mom uses it as a base for her spaghetti sauce sometimes.  It's like bacon, but 100x's more flavorful.  Honestly, this pasta dish needed more.  I did enjoy the flavors of the cheese and the asparagus. I know that if I used fresh peas, they would've packed a better flavor, but frozen were the best I could find.  Overall, it was a very refreshing pasta dish, which is hard to achieve with pasta.  Honestly, I normally don't like fettuccine, because it ends up being way too heavy for me, but in this dish it really worked.  I also loved how everything looked in the serving bowl.  We definitely eat with our eyes and no matter what anyone says, how food looks on the plate is part of our overall enjoyment of the meal.

I'm not saying that this recipe has won me over for BA.  I actually am uncertain about how much more of a subscription I have left.  I highly doubt I'll see many more issues.  Fortunately, though, this means I'll have room for my new favorite:  Cook's Illustrated!


Fettuccine with Peas, Asparagus, and Pancetta
Serves 4-6

12 ounces Fettuccine or Penne
3 ounces Pancetta or Bacon, chopped
1-1/4 pounds Asparagus, trimmed and cut on the diagonal into 1-inch pieces
2 Cups Peas, shelled (or frozen - do not thaw)
1 Bunch Green Onions, thinly sliced with white and pale green pieces separated from dark green pieces
2 Garlic Cloves, pressed or minced
1/2 Cup Parmesan Cheese, freshly grated (plus more for serving)
1/2 Cup Heavy Whipping Cream
3 Tbs. Extra-Virgin Olive Oil
3 Tbs. Fresh Lemon Juice
1 Tbs. Lemon Zest, finely grated
1/4 Cup Fresh Italian Parsley, chopped
1/4 Cup Fresh Basil, thinly sliced and divided

1.  Cook pasta in a pot of boiling salted water until just tender, but still firm to bite.  Drain, while reserving 1/2 cup of the pasta cooking liquid.  Return pasta to the pot.
2.  Meanwhile, cook pancetta in a large nonstick skillet, over medium heat, until crisp.  Using a slotted spoon, transfer pancetta to paper towels to train.  Pour off all but 1 teaspoon of drippings from the skillet.  Add asparagus to skillet and sauté for 3 minutes.  Add peas, white and pale green onion pieces, and garlic; sauté until vegetables are just tender, about 2 minutes.  Remove from heat.
3.  Add vegetable mixture, 1/4 cup of the reserved pasta cooking liquid, dark green pieces of green onion, 1/2 cup of Parmesan cheese, cream, olive oil, lemon juice, lemon zest, half of the parsley and half of the basil. Toss, adding more cooking liquid by tablespoonfuls, if needed.  Season with salt and pepper.  Transfer to a large bowl.
4.  Sprinkle with pancetta, remaining parsley and basil.

bon appetit!

Recipe credit:  Bon Appetit, May 2010.

Saturday, May 8, 2010

Comfort Food: Eggs in Purgatory

First, I must confess that I have definitely slacked off on writing in this blog.  I've actually been really lax on writing in my online journal, too.  Work has blocked all blog and personal sites, which totally sucks.  Although, I find it super funny that Facebook still works.  Anyway, I haven't slacked off on ideas or cooking or taking pictures of what I have been cooking.  So, I am behind, but I promise I'll catch up.  Eventually...

My godmother gave me a waffle iron, coffee mugs, and a brunch cookbook (aptly named Brunch!) for my bridal shower gift.  First, I've always wanted a waffle iron.  I love waffles.  The cookbook was really cool, especially since Marshall and I meet with a particular group of friends each Saturday for breakfast and then once a month one of us hosts a homemade brunch/breakfast.  This time, however, I looked to it for something quick, easy and light to make for dinner one night.  I came across this dish called "Cucurumao" (pronounced "goo-ga-de-mow").  I looked at the corresponding photo and it was intriguing.  The dish is similar to one called "Eggs in Purgatory".  I was so intrigued, I picked it for dinner.  I figured it would be great with a salad and some lovely toasted Italian bread.

Essentially this dish boils down to is poached eggs in tomato sauce.  The tomato sauce for this recipe is a very simple marinara.  The "purgatory" part in the name comes from the fact that the sauce is spicy.  You put the two together and I honestly did not think it would end up being as good as it was.  It was delicious and so incredibly warming.  It was total comfort food.  My comfort food is soft, or mushy, polenta with tomato sauce and Italian sausage.  It's what I get every year at the local Italian festival.  This dish, though, is a definite close second.  It's a perfect dinner dish, too, because it is much heavier than what I would normally want for brunch or breakfast.


Cucurumao
Serves 3-4

2 Tbs. Olive Oil
1 medium-sized Onion, chopped
2 Garlic Cloves, minced
Red Pepper Flakes, to taste
1 28-ounce can Whole Tomatoes with Juice
Kosher Salt and Freshly Ground Black Pepper, to taste
4 Fresh Basil Leaves, torn
6 Large Eggs

1.  Heat the olive oil in a large sauté pan over medium heat.  Add the onions and garlic and sauté until soft and slightly golden, about 4 minutes.  Add garlic and sauté for an additional minute, until fragrant.  Finally, add the red pepper flakes and sauté for 1 minute.
2.  Add the tomatoes.  Crush them before adding them whole to the pan OR you can break them up with a spoon directly in the pan.  Chef's Note:  I place a colander over the pan and empty the contents of the can into the colander.  With my hands, I break up the whole tomatoes, removing any tough bits.  This allows the juice to drain directly into the pan.  Once the tomatoes are crushed, I simply empty the contents of the colander into the pan.  I learned this technique from my Mom.
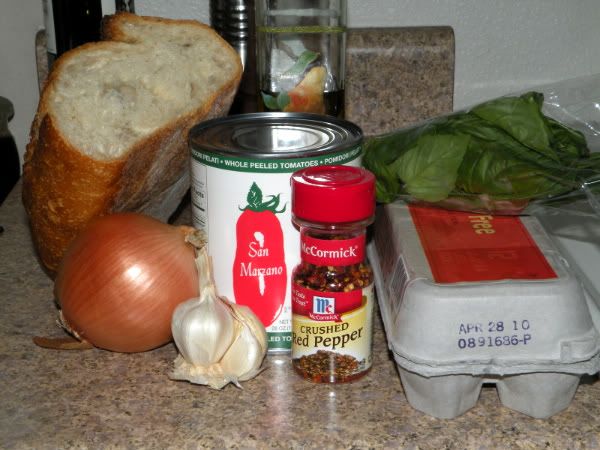
3.  Cook until fairly thick, about 20 minutes.  Season with salt and pepper.  If you find that the sauce is too acidic, you can add a pinch of sugar at this point, as well.  I rarely find that I need the sugar.  If you don't want to use plain granulated sugar, you can simply add some shredded carrot, which will add enough balance of sweet against the tomatoes.
4.  Stir in the basil leaves.
5.  Make 6 impressions into the sauce with the back of a spoon, and break 1 egg into each depression.  Cover each egg with a little tomato sauce.  Cover the pan and cook over medium heat, until eggs are the desired doneness.  If you cook for 4 minutes, you'll get somewhere between over-medium and over-hard eggs.  If you want your eggs more runny, cook for only 3 minutes.

I served my eggs over thick pieces of toasted Italian bread.  I drizzled each side of the bread with olive oil and placed under the broiler.  You can add a little more garlic to the dish, by taking a raw garlic clove and rubbing it on the freshly toasted bread!  Of course, you can always sprinkle with cheese, but by this point I was so ready to dig in, I went without.


bon appetit!


Recipe credit:  Gand, Gayle and Christie Matheson, Gale Gand's BRUNCH! 100 Fantastic Recipes for the Weekend's Best Meal, 2009, Clarkson Potter/Publishers, New York.

Sunday, April 25, 2010

Elegant Meal: Beef Tenderloin with Parsnip and Mushroom Ragout

This particular post is rather late, considering that the elegant dinner from when this menu was served was last weekend.  Oh well, better late than never, right?  Although, that could be said a lot since I have about 2 or 3 posts in the waiting.  I can't just dump them all at once, though.  Not only would that be so tiring that by the last post I would be exhausted of any creative writing talent, which would result in a very curt and boring post, but I have to keep my readers wanting more, right?  Also, it would end up in a "tl;dr" (too long; didn't read) situation with you all and I don't want that to happen.

Anyway, Marshall and I decided to have a few of our friends over for dinner.  There were a few weeks in a row where we were hanging out at each other's house and we left one night saying that it was our turn.  We found a date and I already had a menu in mind:

Beef Tenderloin w/ Parsnip and Mushroom Ragout
Brown and Wild Rice Walnut Pilaf
Green Beans, tossed with Walnut Oil
Jam Tart

The first three items came from the "Winter" menu from a cookbook I received from my godfather's sister for my bridal shower:  Wine, Food, and Friends, by Karen MacNeil (author of The Wine Bible).  It's a great book and contains a lot of really inventive recipes and menus for all times of the year.  She also includes a wine pairing and nutritional information for each dish (all the recipes are from Cooking Light magazine).  Unfortunately when I first cracked this book open, it was in the dead of winter when nothing is in season (even in California) and we were past the holidays, so a huge holiday meal wouldn't be ideal for just Marshall and I.  The dessert for last Saturday's meal came from Smitten Kitchen, which I have mentioned here before (seriously, that girl cooks up a ton of GREAT things).  I thought altogether that this menu would be perfect for a cool April evening and it was.  Everyone was very impressed with the spread and were all extremely happy with the meal.


This was the first time where the meal I cooked all cooked at the same time.  We had a couple of friends over March for Coq au Vin, but that menu was all practically done in advance, which made it super easy.  I tried to plan so that everyone would come over and I wouldn't have to spend all my time talking from the kitchen.  I couldn't really avoid that, so I did the best I could.  In a rare move, I delegated a side dish for Marshall to cook.  He is a very willing helper in the kitchen, but I'm too much of a control-freak and end up taking care of everything.  I had him make the rice pilaf, which was simply delicious.  So much flavor and texture - it really added depth to the rest of the meal.  The tenderloin was easy to prepare and cook, but I still managed to overcook it a little more than I would have preferred (I'm a medium-rare kind of girl).  The beef was seasoned simply would salt and pepper, leaving room for the flavors of the ragout to shine through, as well as the au jus.  The ragout was flavorful, although I accidentally ended up overcooking the parsnips.  They were a little softer than they should've been, but they were still tasty and a great pair with the mushrooms.  Overall, I was really happy with how everything came out and even happier that everyone around the table enjoyed the meal, as well.

The big surprise of the meal, in my opinion, was the Jam Tart.  Oh man, that thing was delicious.  We decided on a wild-fruit jam, which included strawberries, blueberries, blackberries, and raspberries "all picked from the wood" (taken verbatim from the jar label).  The deep flavor of the jam paired beautifully with the corn meal crust, which was more like a cookie crust, than a pie crust.  I was a little frustrated with the fact that I didn't reserve the right amount of dough for the top of the tart, but once I bit into the first bite, I honestly didn't care.  We were really happy having everyone over and we both agree that we need to have people over more often.  Here's to more entertaining!  :)

A huge thanks to Nicole for her photos.  I could've never gotten these ingredients and platters to look this beautiful myself.  Check out her photo blog (and website) for more totally awesome photos!

(recipes after the jump!)


Tuesday, April 20, 2010

The Perfect Family Meal: Shredded Pork Tostadas

One of the many things Marshall and I promised after we got married was to have different people over for dinner at our house to use all our new things.  Marshall and I have been going down the list of people and one of those select few was my sister.  My sister and her husband have two amazing kids (twins), so I had to come up with something that everyone would enjoy.  Luckily, my niece and nephew aren't too picky, so finding something wasn't too difficult.  We're all big fans of Mexican food, plus it's great for casual get-togethers, which is what I was aiming for having my sister and her family over.

I turned to my new favorite cooking magazine:  Cooks Illustrated.  Unfortunately, when I received the horrible news that Conde Nast closed shop on Gourmet, I had to find something else to feed my repertoire.  I'm not the biggest fan of Conde Nast's other cooking magazine, Bon Appetit, even though I was slated to fulfill the rest of my Gourmet subscription with BA.  That's another post altogether, though.  In any case, I picked up CI off the news rack at the grocery store.  I loved its minimalist design (all 1-color printing, except for the last page), down-to-earth writing style, tried and tested recipes (CI is the companion to the PBS show, America's Test Kitchen), and lastly (but not least) for the fact that there are NO advertisements.  Even Gourmet was inundated with big annoying advertisements and BI is no different.  I understand that's where the magazine gets the majority of their revenue, but they really get in the way.  I've since bought 3 issues of CI in a row and I'm beginning to wonder if I just shouldn't buy a subscription already.


Anyway, the March/April issue contained a recipe for Shredded Pork Tostadas.  I had never cooked up pork shoulder before, but the recipe made it look like such an easy process and I could practically taste the spicy deliciousness by merely reading the ingredients.  Also, the magazine included some great tips, like using a potato masher to shred the cooked pork and then using the SAME potato masher as a weight for frying the tortillas.  By the way, the best tortillas for this are the "Homemade" corn tortillas at Trader Joe's.  They don't contain any preservatives and they smell delicious.  My sister commented that my kitchen smelled like a Mexican restaurant, when I was frying these up!


I made this the first time right when I got the magazine, but when faced with decided what to cook my sister and her family, I decided to gladly make it again.  It was a big hit with everyone, even though my niece and nephew complained it was too spicy.  I only used the smaller amount of chipotle powder, but I suppose for little mouths it might have been a little too much.  My sister brought over some leftover black bean soup, which had the consistency of really good black bean dip, and that ended up being a perfect topper for the tostadas.  I can't seem to have a tostada without beans:  the first time I made these for Marshall and I, I insisted on having beans.  Anyway, my sister and her husband gobbled theirs down and my sister kept complimenting, so I'll chalk that up as a W and move on from there.  :)  It was fun having everyone over and I realized we need to do it more often.  When my sister and her husband moved into their house a few years ago, Marshall and I were going over there every few weeks to play Settlers of Catan.  I miss those nights.  Anyway, it was a treat cooking for others and even bigger treat that everyone really enjoyed the food.


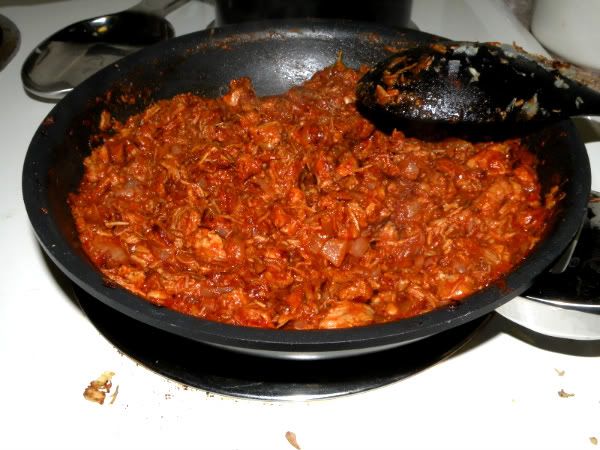
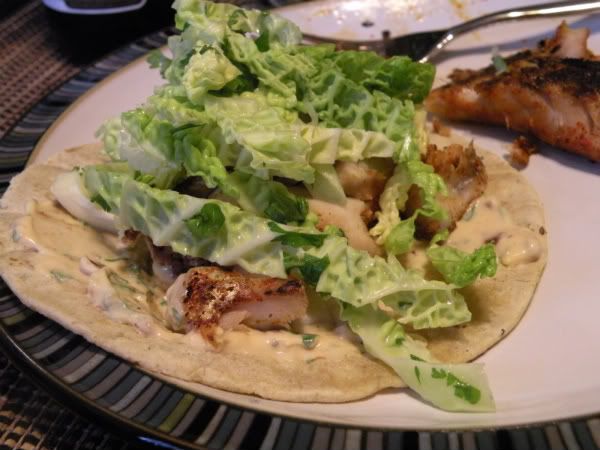
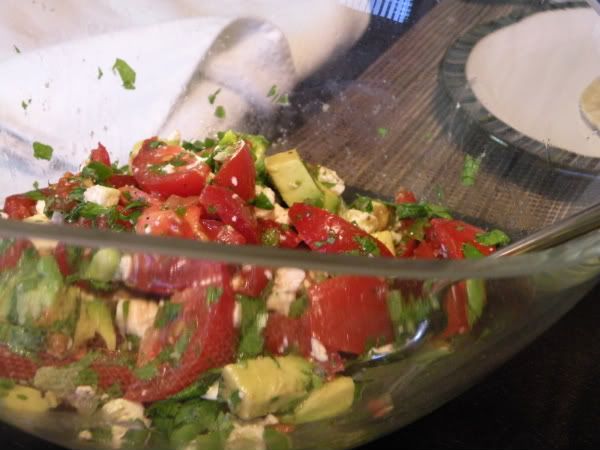
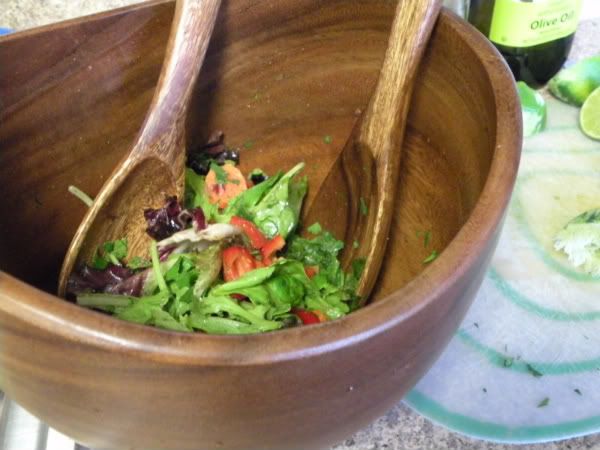
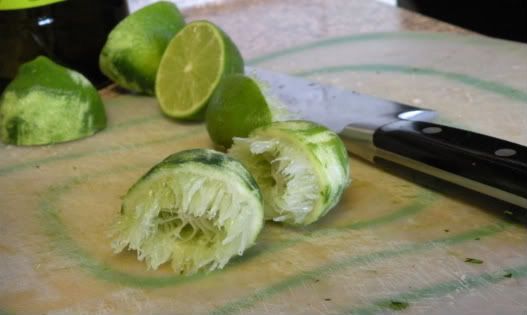
Among the black beans, we had the typical toppings:  avocado (I was lucky and found some California-grown Organic ones at the store, which were less than the ones from Mexico), Napa cabbage, fresh cilantro, and lime wedges.  Oh, and you know we had the perfect libations to wash down the delicious pork:  Modelo Negro, naturally!


Spicy Mexican Shredded Pork Tostadas (Tinga)
Tinga
2 pounds boneless pork butt, trimmed of excess fat and cut into 1-inch pieces
2 Onions (medium-sized): 1 quartered and 1 chopped fine
5 Garlic Cloves: 3 peeled and smashed and 2 minced or pressed through garlic press
4 Sprigs Fresh Thyme
Table salt (Kosher salt, which is what I use, works just fine)
2 Tbs Olive Oil
1/2 tsp dried oregano
1 (14.5-ounce) can Tomato Sauce
1 Tbs Chipotle Powder (You can easily substitute whole canned Chipotle in Adobo Sauce, if you have those on-hand.)
2 Bay Leaves

Tostadas
3/4 Cup Vegetable Oil
12 (6-inch) corn tortillas
Table salt

Garnishes
Queso Fresco or Feta Cheese
Fresh Cilantro
Sour Cream
Diced Avocado
Lime Wedges

1. FOR THE TINGA: Bring pork, quartered onion, smashed garlic cloves, thyme, 1 teaspoon salt, and 6 cups water to simmer in large saucepan over medium-high heat, skimming off any foam that rises to surface. Reduce heat to medium-low, partially cover, and cook until pork is tender, 75 to 90 minutes. Drain pork, reserving 1 cup cooking liquid. Discard onion, garlic, and thyme. Return pork to saucepan and, using a potato masher, mash until shredded into rough 1/2-inch pieces; set aside. The pork can easily be made up to 2 days in advance, kept in an air-tight container in the fridge.

2. Heat olive oil in 12-inch nonstick skillet over medium-high heat until shimmering. Add shredded pork, chopped onion, and oregano; cook, stirring often, until pork is well browned and crisp, 7 to 10 minutes. Add minced garlic and cook until fragrant, about 30 seconds.

3. Stir in tomato sauce, chipotle powder, reserved pork cooking liquid, and bay leaves; simmer until almost all liquid has evaporated, 5 to 7 minutes. Remove and discard bay leaves and season with salt to taste.

4. TO FRY TOSTADAS (OPTIONAL): Heat vegetable oil in 8-inch heavy-bottomed skillet over medium heat to 350 degrees. Using fork, poke center of each tortilla 3 or 4 times (to prevent puffing and allow for even cooking). Fry 1 at a time, holding metal potato masher in upright position on top of tortilla to keep it submerged, until crisp and lightly browned, 45 to 60 seconds (no flipping is necessary). Drain on paper towel-lined plate and season with salt to taste. Repeat with remaining tortillas.

5. SERVE! Build your tostada in whatever fashion you see fit.

bon appetit!

Saturday, April 10, 2010

Christening the Slow Cooker - Tangy Spiced Brisket

One thing that surprised me, and possibly Marshall too, was getting all the gifts we got for our wedding.  I, at least, wasn't expecting to get nearly as much as we ended up receiving.  It just amazed me how generous people can be.  One of the items we registered for, and received, was a slow cooker (thanks, Sar!).  It's funny how something that was such a big hit 30 years ago could make such a come-back.  There are a ton of cookbooks out there dedicated just for slow cookers.  I had heard of the many wonders which can be made in a slow cooker and how easy it can be.  I knew I had to get my hands on one. 


I finally found a recipe worthy enough for christening our slow cooker:  Tangy Spiced Brisket (courtesy of Smitten Kitchen, a great food blog).  I had never made brisket myself before.  I've certainly eaten it, that's for sure, but never made it from scratch.  My friend, Paul, told me I was tempting fate for attempting brisket this close to Passover; even going so far as to calling me a shiksa.  I pressed on, though, and Marshall and I were rewarded with a great tasting meal of tender pull-apart meat covered in a mildly spicy and tangy sauce.  Traditionally, you'd serve this over a bed of egg noodles, but we went with whipped potatoes, instead.  I like egg noodles, but I simply love potatoes in all its various forms.  It was simply delicious and something I will certainly keep in my repertoire.

The recipe that follows is a slight adaptation from the original (which was apparently an adaptation to begin with).  The only differences between the recipe below and where I got it, is that it's been halved.  There was simply no way I was going to make 10-pounds worth of brisket for just the two of us!

P.S.  Yes, that's broccoli on the plate.  I happen to LOVE broccoli.  I could eat it all day every day.  Honestly, I'll put it on the side of anything.

P.P.S  Marshall gives it his bite of approval!


Tangy Spiced Brisket
1-1/2 Large Onions, sliced
1-1/2 Tbs Vegetable Oil
3 Garlic Cloves, peeled and halved
1/2 tsp Paprika
1/2 tsp Salt
3/4 tsp Garlic Powder
3/4 tsp Black Pepper
3/4 tsp Onion Powder
1/4 tsp Cayenne
1/4 tsp Dried Oregano
1/4 tsp Dried Thyme
1/2 Cups Beef Stock (try for low or unsalted)
1/2 Cup Ketchup
1/2 Cup Chili Sauce (I used Sriracha)
1/2 Cup Brown Sugar
4 to 5lb Brisket

Prepare the sauce: Heat a large skillet over medium high heat and sauté onions in vegetable oil, stirring occasionally, until caramelized and most of liquid has evaporated, about 15 minutes. Add halved garlic cloves and saute for 3 minutes more. Stir in spices and seasoning (paprika, salt, garlic and onion powders, black pepper, cayenne, oregano and thyme) and cook for 2 minutes. Set aside.

In a large bowl, stir together the beef stock, ketchup, chili sauce and brown sugar. Don’t worry if your brown sugar is lumpy (mine always is), the acidity of the ingredients will quickly break it down.

If baking in oven: Preheat oven to 350 degrees. Place brisket in a baking dish or casserole, spread onion mixture over the top, then pour sauce mixture over the entire dish. Cover tightly with foil bake until very tender but not falling apart, about 3 to 4 hours.

If making in a slow cooker (which I highly, highly recommend): Place brisket in a slow cooker, spread onion mixture over the top, then pour sauce mixture over the entire dish. Cover with the lid and cook it on LOW for 10 hours. (I like to start it before I go to bed, and process it in the morning to rest over the course of the day in the fridge.)

For both methods, rest the dish: When the brisket is cooked but still hot, use a spoon to scrape off any large fat deposits adhered to the top and bottom of the brisket.  This part is easiest to do when hot.  Don't worry, the sauce will be de-fatted after it has chilled.

If you’re using a slow cooker, transfer the brisket and all of its sauce to a baking dish. If you’ve baked it in the oven, you can continue in that same dish.

Chill entire dish in the fridge for several hours and up to one day; this resting time will significantly enhance the flavor and texture of the meat.

An hour before you’re ready to serve it: Preheat your oven to 300°F, and remove the dish from the fridge. Remove all of the fat that has solidified with a slotted spoon for a less oily finish.
Carefully remove the meat from its sauce and place on a large cutting board. Cut the brisket into 1/2-inch slices.

If you like a smoother sauce, this is a good time to run it through a blender or literally just smash up the onion and garlic strands with a wooden spoon. They’ll be so soft, that’s all it takes.

Carefully place the sliced meat back into the sauce and spoon the sauce over the meat. Replace the lid or cover the dish tightly with foil and reheat in the oven until it is bubbling at the edges — this usually takes up to to 30 minutes.

bon appetit!

Wednesday, April 7, 2010

A Light Meal: Zucchini Frittata

I would like to state up-front, that you'll have to forgive me for the photos.  I'm not that great behind the camera and sadly I didn't have my trusty side-kick husband to help take pictures.  This is also the reason why I don't have any preparation pictures.  In any case, let's get on with the show, shall we?


Last night called for a light meal of sorts.  Later this week we're planning on eating brisket, so I thought we'd even out things with something light to start:  Zucchini Frittata with Parmesan.  My mom made frittatas (the Italian version of the Spanish tortilla) all the time when I was little.  She used it as a way to get rid of leftover vegetables in the fridge or when she was pressed for time.  It's a great quick dish when you want something light, but substantial.  You can pretty much use any vegetable or meat you like in it, too, which makes for a very flexible dish.  The basics call for eggs and milk, it's up to the cook to fill in the rest.  Anything you'd put in a scramble, or omelette, or quiche would be just fine in a frittata.  The great thing is you don't have to worry about making a crust!  This particular frittata also gave me an excuse to try out our new mandoline slicer (an awesome wedding gift).  The mandoline made slicing up the zucchini very easy and allowed for uniform slice size and ultimately uniform cooking throughout. Obviously, you can easily chop and slice with a knife; you certainly don't need a special slicer.  Just remember to try and keep the slices as evenly as possible, otherwise you'll end up with possible soggy thin pieces next to hardly cooked thick ones.


This particular frittata turned out beautifully.  It was tasty and delicious and the green of the zucchini was beautiful next to the browned cheesy crust on top.  I paired it with a lovely green salad with carrots, celery, green onions, garlic-stuffed olives, and cherry tomatoes with bright sherry vinegar and olive oil.  The sharp acidity cut through the rich egg of the frittata.  I also had a glass of Tobin James Chardonnay, but that's neither here nor there (Marshall went for a New Belgium Mothership Wit, instead)!


Zucchini and Parmesan Frittata
(FYI:  The measurements here are merely estimates.  Like a lot of my everyday recipes, I don't measure out anything, except for the big ingredients.)
 
6 whole eggs
1/4-1/2 cup of half-and-half (you could easily use whole or whatever level of fat milk you prefer)
1 tsp dried tarragon
1/4 tsp grated nutmeg (fresh is best, if possible)
salt and pepper (to taste)
3/4 cup parmesan cheese, freshly grated
4 small zucchini, thinly sliced
1 Tbs olive oil (personally, I like to use half butter, half olive oil)

Preheat your broiler with rack in the upper-middle of the oven.  In a large mixing bowl, beat together the eggs and half-and-half.  Add in the tarragon (breaking up the leaves, if they're big), nutmeg, and salt and pepper.  Stir in about 3/4 of the grated cheese into the egg mixture, then fold in the zucchini slices.

Heat the olive oil in a non-stick (oven-safe) fry pan over medium heat (medium-high, if using a gas range).  Once the pan is well heated, add in the egg mixture.  Run a rubber spatula around the edges of the pan and lightly scrambling the egg in the middle (you want to keep the egg as flat in the pan as possible, but you don't want it to stick).  Shake the pan lightly every once in a while and once the mixture is set (not wobbling or liquid-like), sprinkle the rest of the grated parmesan cheese over the top and place under the broiler.  Bake for roughly 10-12 minutes, until the frittata is cooked through and the top is a golden brown.  Allow to rest for at least 5 minutes before serving.

This particular recipe serves 4 as a main dish (1 serving being a quarter of the whole firttata) and can serve many more as a side dish.  It can even be cut up into small appetizer-size servings, as well (my sister's dad makes these all the time for parties)

bon appetit!

Monday, April 5, 2010

Bienvenue!

Bienvenue and welcome to my food blog!  I have decided to join the masses and try my hand at food blogging.  I'm no stranger to online journaling, but I am new to blogging.  Yes, there is a difference, but I won't go into semantics here (that's what my online journal is for!).  No, this space is dedicated to my adventures in cooking and food.  I love to cook and I always have.  I was making myself lamb chops and pasta pesto when I was a sophomore in college, just so I would feel more at home.  My mom sparked the love of food and cooking within me.  She was always encouraging of me in the kitchen; letting me help with everything she made and all the parties she hosted while I was growing up.  I've keep the fire going and have found peace and tranquility in the kitchen.  Now, teamed up with my wonderful and hungry husband, I know I can tackle any recipe that comes my way!

I know there are many food blogs out there; I read a few of them myself.  I'm not here to compete with them.  My goal here is to share my love of food and cooking and I hope to inspire the same love of cooking my mom inspired within me to anyone who happens upon this blog.