Sunday, April 25, 2010

Elegant Meal: Beef Tenderloin with Parsnip and Mushroom Ragout

This particular post is rather late, considering that the elegant dinner from when this menu was served was last weekend.  Oh well, better late than never, right?  Although, that could be said a lot since I have about 2 or 3 posts in the waiting.  I can't just dump them all at once, though.  Not only would that be so tiring that by the last post I would be exhausted of any creative writing talent, which would result in a very curt and boring post, but I have to keep my readers wanting more, right?  Also, it would end up in a "tl;dr" (too long; didn't read) situation with you all and I don't want that to happen.

Anyway, Marshall and I decided to have a few of our friends over for dinner.  There were a few weeks in a row where we were hanging out at each other's house and we left one night saying that it was our turn.  We found a date and I already had a menu in mind:

Beef Tenderloin w/ Parsnip and Mushroom Ragout
Brown and Wild Rice Walnut Pilaf
Green Beans, tossed with Walnut Oil
Jam Tart

The first three items came from the "Winter" menu from a cookbook I received from my godfather's sister for my bridal shower:  Wine, Food, and Friends, by Karen MacNeil (author of The Wine Bible).  It's a great book and contains a lot of really inventive recipes and menus for all times of the year.  She also includes a wine pairing and nutritional information for each dish (all the recipes are from Cooking Light magazine).  Unfortunately when I first cracked this book open, it was in the dead of winter when nothing is in season (even in California) and we were past the holidays, so a huge holiday meal wouldn't be ideal for just Marshall and I.  The dessert for last Saturday's meal came from Smitten Kitchen, which I have mentioned here before (seriously, that girl cooks up a ton of GREAT things).  I thought altogether that this menu would be perfect for a cool April evening and it was.  Everyone was very impressed with the spread and were all extremely happy with the meal.


This was the first time where the meal I cooked all cooked at the same time.  We had a couple of friends over March for Coq au Vin, but that menu was all practically done in advance, which made it super easy.  I tried to plan so that everyone would come over and I wouldn't have to spend all my time talking from the kitchen.  I couldn't really avoid that, so I did the best I could.  In a rare move, I delegated a side dish for Marshall to cook.  He is a very willing helper in the kitchen, but I'm too much of a control-freak and end up taking care of everything.  I had him make the rice pilaf, which was simply delicious.  So much flavor and texture - it really added depth to the rest of the meal.  The tenderloin was easy to prepare and cook, but I still managed to overcook it a little more than I would have preferred (I'm a medium-rare kind of girl).  The beef was seasoned simply would salt and pepper, leaving room for the flavors of the ragout to shine through, as well as the au jus.  The ragout was flavorful, although I accidentally ended up overcooking the parsnips.  They were a little softer than they should've been, but they were still tasty and a great pair with the mushrooms.  Overall, I was really happy with how everything came out and even happier that everyone around the table enjoyed the meal, as well.

The big surprise of the meal, in my opinion, was the Jam Tart.  Oh man, that thing was delicious.  We decided on a wild-fruit jam, which included strawberries, blueberries, blackberries, and raspberries "all picked from the wood" (taken verbatim from the jar label).  The deep flavor of the jam paired beautifully with the corn meal crust, which was more like a cookie crust, than a pie crust.  I was a little frustrated with the fact that I didn't reserve the right amount of dough for the top of the tart, but once I bit into the first bite, I honestly didn't care.  We were really happy having everyone over and we both agree that we need to have people over more often.  Here's to more entertaining!  :)

A huge thanks to Nicole for her photos.  I could've never gotten these ingredients and platters to look this beautiful myself.  Check out her photo blog (and website) for more totally awesome photos!

(recipes after the jump!)


Tuesday, April 20, 2010

The Perfect Family Meal: Shredded Pork Tostadas

One of the many things Marshall and I promised after we got married was to have different people over for dinner at our house to use all our new things.  Marshall and I have been going down the list of people and one of those select few was my sister.  My sister and her husband have two amazing kids (twins), so I had to come up with something that everyone would enjoy.  Luckily, my niece and nephew aren't too picky, so finding something wasn't too difficult.  We're all big fans of Mexican food, plus it's great for casual get-togethers, which is what I was aiming for having my sister and her family over.

I turned to my new favorite cooking magazine:  Cooks Illustrated.  Unfortunately, when I received the horrible news that Conde Nast closed shop on Gourmet, I had to find something else to feed my repertoire.  I'm not the biggest fan of Conde Nast's other cooking magazine, Bon Appetit, even though I was slated to fulfill the rest of my Gourmet subscription with BA.  That's another post altogether, though.  In any case, I picked up CI off the news rack at the grocery store.  I loved its minimalist design (all 1-color printing, except for the last page), down-to-earth writing style, tried and tested recipes (CI is the companion to the PBS show, America's Test Kitchen), and lastly (but not least) for the fact that there are NO advertisements.  Even Gourmet was inundated with big annoying advertisements and BI is no different.  I understand that's where the magazine gets the majority of their revenue, but they really get in the way.  I've since bought 3 issues of CI in a row and I'm beginning to wonder if I just shouldn't buy a subscription already.


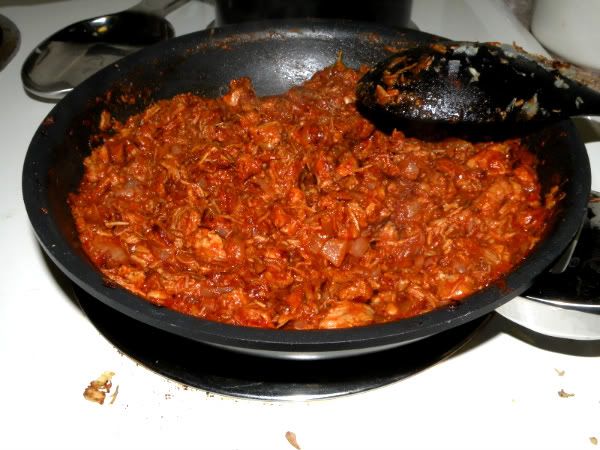
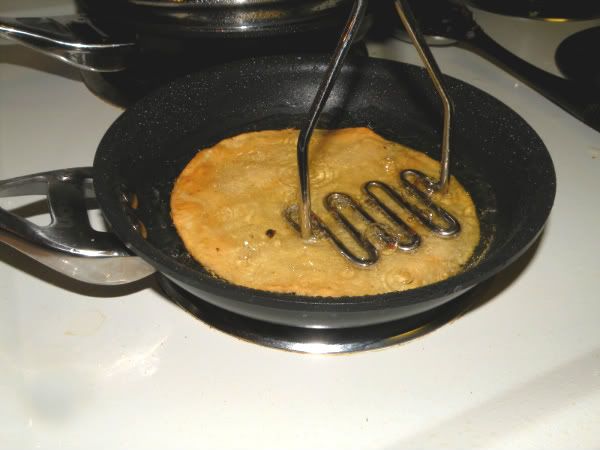
Anyway, the March/April issue contained a recipe for Shredded Pork Tostadas.  I had never cooked up pork shoulder before, but the recipe made it look like such an easy process and I could practically taste the spicy deliciousness by merely reading the ingredients.  Also, the magazine included some great tips, like using a potato masher to shred the cooked pork and then using the SAME potato masher as a weight for frying the tortillas.  By the way, the best tortillas for this are the "Homemade" corn tortillas at Trader Joe's.  They don't contain any preservatives and they smell delicious.  My sister commented that my kitchen smelled like a Mexican restaurant, when I was frying these up!


I made this the first time right when I got the magazine, but when faced with decided what to cook my sister and her family, I decided to gladly make it again.  It was a big hit with everyone, even though my niece and nephew complained it was too spicy.  I only used the smaller amount of chipotle powder, but I suppose for little mouths it might have been a little too much.  My sister brought over some leftover black bean soup, which had the consistency of really good black bean dip, and that ended up being a perfect topper for the tostadas.  I can't seem to have a tostada without beans:  the first time I made these for Marshall and I, I insisted on having beans.  Anyway, my sister and her husband gobbled theirs down and my sister kept complimenting, so I'll chalk that up as a W and move on from there.  :)  It was fun having everyone over and I realized we need to do it more often.  When my sister and her husband moved into their house a few years ago, Marshall and I were going over there every few weeks to play Settlers of Catan.  I miss those nights.  Anyway, it was a treat cooking for others and even bigger treat that everyone really enjoyed the food.


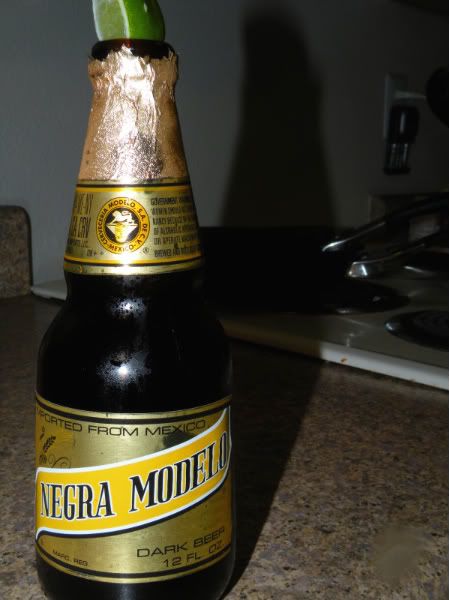
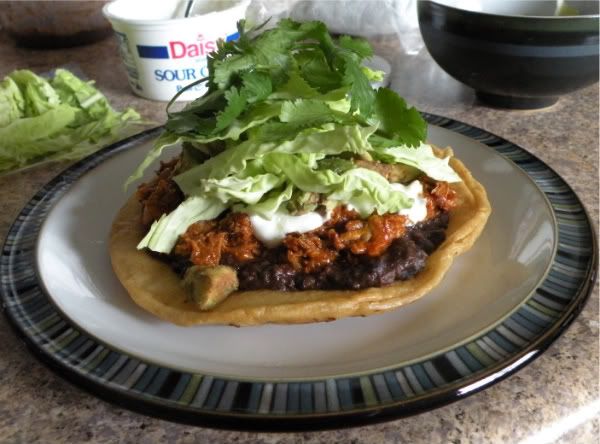
Among the black beans, we had the typical toppings:  avocado (I was lucky and found some California-grown Organic ones at the store, which were less than the ones from Mexico), Napa cabbage, fresh cilantro, and lime wedges.  Oh, and you know we had the perfect libations to wash down the delicious pork:  Modelo Negro, naturally!


Spicy Mexican Shredded Pork Tostadas (Tinga)
Tinga
2 pounds boneless pork butt, trimmed of excess fat and cut into 1-inch pieces
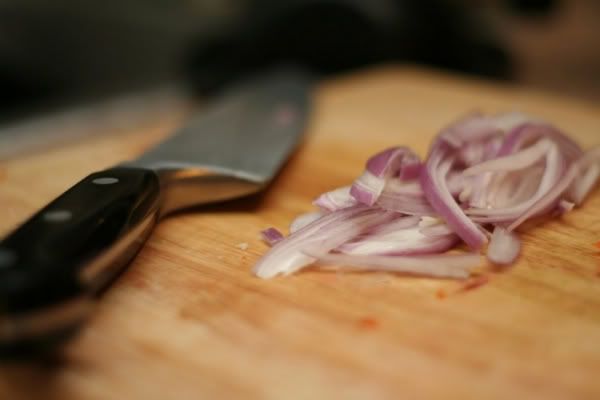
2 Onions (medium-sized): 1 quartered and 1 chopped fine
5 Garlic Cloves: 3 peeled and smashed and 2 minced or pressed through garlic press
4 Sprigs Fresh Thyme
Table salt (Kosher salt, which is what I use, works just fine)
2 Tbs Olive Oil
1/2 tsp dried oregano
1 (14.5-ounce) can Tomato Sauce
1 Tbs Chipotle Powder (You can easily substitute whole canned Chipotle in Adobo Sauce, if you have those on-hand.)
2 Bay Leaves

Tostadas
3/4 Cup Vegetable Oil
12 (6-inch) corn tortillas
Table salt

Garnishes
Queso Fresco or Feta Cheese
Fresh Cilantro
Sour Cream
Diced Avocado
Lime Wedges

1. FOR THE TINGA: Bring pork, quartered onion, smashed garlic cloves, thyme, 1 teaspoon salt, and 6 cups water to simmer in large saucepan over medium-high heat, skimming off any foam that rises to surface. Reduce heat to medium-low, partially cover, and cook until pork is tender, 75 to 90 minutes. Drain pork, reserving 1 cup cooking liquid. Discard onion, garlic, and thyme. Return pork to saucepan and, using a potato masher, mash until shredded into rough 1/2-inch pieces; set aside. The pork can easily be made up to 2 days in advance, kept in an air-tight container in the fridge.

2. Heat olive oil in 12-inch nonstick skillet over medium-high heat until shimmering. Add shredded pork, chopped onion, and oregano; cook, stirring often, until pork is well browned and crisp, 7 to 10 minutes. Add minced garlic and cook until fragrant, about 30 seconds.

3. Stir in tomato sauce, chipotle powder, reserved pork cooking liquid, and bay leaves; simmer until almost all liquid has evaporated, 5 to 7 minutes. Remove and discard bay leaves and season with salt to taste.

4. TO FRY TOSTADAS (OPTIONAL): Heat vegetable oil in 8-inch heavy-bottomed skillet over medium heat to 350 degrees. Using fork, poke center of each tortilla 3 or 4 times (to prevent puffing and allow for even cooking). Fry 1 at a time, holding metal potato masher in upright position on top of tortilla to keep it submerged, until crisp and lightly browned, 45 to 60 seconds (no flipping is necessary). Drain on paper towel-lined plate and season with salt to taste. Repeat with remaining tortillas.

5. SERVE! Build your tostada in whatever fashion you see fit.

bon appetit!

Saturday, April 10, 2010

Christening the Slow Cooker - Tangy Spiced Brisket

One thing that surprised me, and possibly Marshall too, was getting all the gifts we got for our wedding.  I, at least, wasn't expecting to get nearly as much as we ended up receiving.  It just amazed me how generous people can be.  One of the items we registered for, and received, was a slow cooker (thanks, Sar!).  It's funny how something that was such a big hit 30 years ago could make such a come-back.  There are a ton of cookbooks out there dedicated just for slow cookers.  I had heard of the many wonders which can be made in a slow cooker and how easy it can be.  I knew I had to get my hands on one. 


I finally found a recipe worthy enough for christening our slow cooker:  Tangy Spiced Brisket (courtesy of Smitten Kitchen, a great food blog).  I had never made brisket myself before.  I've certainly eaten it, that's for sure, but never made it from scratch.  My friend, Paul, told me I was tempting fate for attempting brisket this close to Passover; even going so far as to calling me a shiksa.  I pressed on, though, and Marshall and I were rewarded with a great tasting meal of tender pull-apart meat covered in a mildly spicy and tangy sauce.  Traditionally, you'd serve this over a bed of egg noodles, but we went with whipped potatoes, instead.  I like egg noodles, but I simply love potatoes in all its various forms.  It was simply delicious and something I will certainly keep in my repertoire.

The recipe that follows is a slight adaptation from the original (which was apparently an adaptation to begin with).  The only differences between the recipe below and where I got it, is that it's been halved.  There was simply no way I was going to make 10-pounds worth of brisket for just the two of us!

P.S.  Yes, that's broccoli on the plate.  I happen to LOVE broccoli.  I could eat it all day every day.  Honestly, I'll put it on the side of anything.

P.P.S  Marshall gives it his bite of approval!


Tangy Spiced Brisket
1-1/2 Large Onions, sliced
1-1/2 Tbs Vegetable Oil
3 Garlic Cloves, peeled and halved
1/2 tsp Paprika
1/2 tsp Salt
3/4 tsp Garlic Powder
3/4 tsp Black Pepper
3/4 tsp Onion Powder
1/4 tsp Cayenne
1/4 tsp Dried Oregano
1/4 tsp Dried Thyme
1/2 Cups Beef Stock (try for low or unsalted)
1/2 Cup Ketchup
1/2 Cup Chili Sauce (I used Sriracha)
1/2 Cup Brown Sugar
4 to 5lb Brisket

Prepare the sauce: Heat a large skillet over medium high heat and sauté onions in vegetable oil, stirring occasionally, until caramelized and most of liquid has evaporated, about 15 minutes. Add halved garlic cloves and saute for 3 minutes more. Stir in spices and seasoning (paprika, salt, garlic and onion powders, black pepper, cayenne, oregano and thyme) and cook for 2 minutes. Set aside.

In a large bowl, stir together the beef stock, ketchup, chili sauce and brown sugar. Don’t worry if your brown sugar is lumpy (mine always is), the acidity of the ingredients will quickly break it down.

If baking in oven: Preheat oven to 350 degrees. Place brisket in a baking dish or casserole, spread onion mixture over the top, then pour sauce mixture over the entire dish. Cover tightly with foil bake until very tender but not falling apart, about 3 to 4 hours.

If making in a slow cooker (which I highly, highly recommend): Place brisket in a slow cooker, spread onion mixture over the top, then pour sauce mixture over the entire dish. Cover with the lid and cook it on LOW for 10 hours. (I like to start it before I go to bed, and process it in the morning to rest over the course of the day in the fridge.)

For both methods, rest the dish: When the brisket is cooked but still hot, use a spoon to scrape off any large fat deposits adhered to the top and bottom of the brisket.  This part is easiest to do when hot.  Don't worry, the sauce will be de-fatted after it has chilled.

If you’re using a slow cooker, transfer the brisket and all of its sauce to a baking dish. If you’ve baked it in the oven, you can continue in that same dish.

Chill entire dish in the fridge for several hours and up to one day; this resting time will significantly enhance the flavor and texture of the meat.

An hour before you’re ready to serve it: Preheat your oven to 300°F, and remove the dish from the fridge. Remove all of the fat that has solidified with a slotted spoon for a less oily finish.
Carefully remove the meat from its sauce and place on a large cutting board. Cut the brisket into 1/2-inch slices.

If you like a smoother sauce, this is a good time to run it through a blender or literally just smash up the onion and garlic strands with a wooden spoon. They’ll be so soft, that’s all it takes.

Carefully place the sliced meat back into the sauce and spoon the sauce over the meat. Replace the lid or cover the dish tightly with foil and reheat in the oven until it is bubbling at the edges — this usually takes up to to 30 minutes.

bon appetit!

Wednesday, April 7, 2010

A Light Meal: Zucchini Frittata

I would like to state up-front, that you'll have to forgive me for the photos.  I'm not that great behind the camera and sadly I didn't have my trusty side-kick husband to help take pictures.  This is also the reason why I don't have any preparation pictures.  In any case, let's get on with the show, shall we?


Last night called for a light meal of sorts.  Later this week we're planning on eating brisket, so I thought we'd even out things with something light to start:  Zucchini Frittata with Parmesan.  My mom made frittatas (the Italian version of the Spanish tortilla) all the time when I was little.  She used it as a way to get rid of leftover vegetables in the fridge or when she was pressed for time.  It's a great quick dish when you want something light, but substantial.  You can pretty much use any vegetable or meat you like in it, too, which makes for a very flexible dish.  The basics call for eggs and milk, it's up to the cook to fill in the rest.  Anything you'd put in a scramble, or omelette, or quiche would be just fine in a frittata.  The great thing is you don't have to worry about making a crust!  This particular frittata also gave me an excuse to try out our new mandoline slicer (an awesome wedding gift).  The mandoline made slicing up the zucchini very easy and allowed for uniform slice size and ultimately uniform cooking throughout. Obviously, you can easily chop and slice with a knife; you certainly don't need a special slicer.  Just remember to try and keep the slices as evenly as possible, otherwise you'll end up with possible soggy thin pieces next to hardly cooked thick ones.


This particular frittata turned out beautifully.  It was tasty and delicious and the green of the zucchini was beautiful next to the browned cheesy crust on top.  I paired it with a lovely green salad with carrots, celery, green onions, garlic-stuffed olives, and cherry tomatoes with bright sherry vinegar and olive oil.  The sharp acidity cut through the rich egg of the frittata.  I also had a glass of Tobin James Chardonnay, but that's neither here nor there (Marshall went for a New Belgium Mothership Wit, instead)!


Zucchini and Parmesan Frittata
(FYI:  The measurements here are merely estimates.  Like a lot of my everyday recipes, I don't measure out anything, except for the big ingredients.)
 
6 whole eggs
1/4-1/2 cup of half-and-half (you could easily use whole or whatever level of fat milk you prefer)
1 tsp dried tarragon
1/4 tsp grated nutmeg (fresh is best, if possible)
salt and pepper (to taste)
3/4 cup parmesan cheese, freshly grated
4 small zucchini, thinly sliced
1 Tbs olive oil (personally, I like to use half butter, half olive oil)

Preheat your broiler with rack in the upper-middle of the oven.  In a large mixing bowl, beat together the eggs and half-and-half.  Add in the tarragon (breaking up the leaves, if they're big), nutmeg, and salt and pepper.  Stir in about 3/4 of the grated cheese into the egg mixture, then fold in the zucchini slices.

Heat the olive oil in a non-stick (oven-safe) fry pan over medium heat (medium-high, if using a gas range).  Once the pan is well heated, add in the egg mixture.  Run a rubber spatula around the edges of the pan and lightly scrambling the egg in the middle (you want to keep the egg as flat in the pan as possible, but you don't want it to stick).  Shake the pan lightly every once in a while and once the mixture is set (not wobbling or liquid-like), sprinkle the rest of the grated parmesan cheese over the top and place under the broiler.  Bake for roughly 10-12 minutes, until the frittata is cooked through and the top is a golden brown.  Allow to rest for at least 5 minutes before serving.

This particular recipe serves 4 as a main dish (1 serving being a quarter of the whole firttata) and can serve many more as a side dish.  It can even be cut up into small appetizer-size servings, as well (my sister's dad makes these all the time for parties)

bon appetit!

Monday, April 5, 2010

Bienvenue!

Bienvenue and welcome to my food blog!  I have decided to join the masses and try my hand at food blogging.  I'm no stranger to online journaling, but I am new to blogging.  Yes, there is a difference, but I won't go into semantics here (that's what my online journal is for!).  No, this space is dedicated to my adventures in cooking and food.  I love to cook and I always have.  I was making myself lamb chops and pasta pesto when I was a sophomore in college, just so I would feel more at home.  My mom sparked the love of food and cooking within me.  She was always encouraging of me in the kitchen; letting me help with everything she made and all the parties she hosted while I was growing up.  I've keep the fire going and have found peace and tranquility in the kitchen.  Now, teamed up with my wonderful and hungry husband, I know I can tackle any recipe that comes my way!

I know there are many food blogs out there; I read a few of them myself.  I'm not here to compete with them.  My goal here is to share my love of food and cooking and I hope to inspire the same love of cooking my mom inspired within me to anyone who happens upon this blog.